How To Build A Custom PC For Video Editing
Creating videos requires a machine that can handle heavy files, complex software, and multitasking. Pre-built computers often lack the power or flexibility needed for tasks like rendering 4K footage or editing multiple layers of audio and visuals. Building a custom PC allows creators to choose parts that match their specific needs, ensuring smooth performance and future-proof upgrades. Unlike generic laptops or desktops, a tailored setup can balance speed, storage, and reliability while staying within budget.
Understanding Key Components For Video Editing
Video editing software, such as Adobe Premiere Pro or DaVinci Resolve, demands high processing power and fast memory. A custom PC gives users control over components like the processor, graphics card, and storage drives, directly impacting editing efficiency. This guide breaks down the essentials for building a machine that can tackle even the most demanding projects.
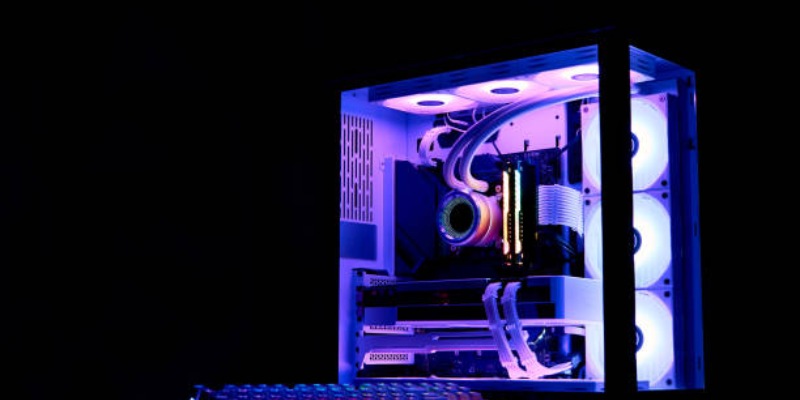
A video editing PC relies on several core parts working together. These include the central processing unit (CPU), random-access memory (RAM), graphics processing unit (GPU), storage drives, motherboard, power supply, and cooling system. Each component uniquely handles tasks like rendering, exporting, and real-time playback of high-resolution videos.
Central Processing Unit (CPU)
The CPU acts as the brain of the computer. It handles calculations, runs software, and manages background processes. For video editing, a powerful CPU reduces rendering times and ensures smooth playback of large files. Processors with more cores and higher clock speeds perform better, especially with 4K or 8K footage. Brands like AMD and Intel offer options tailored for creative professionals.
Random-Access Memory (RAM)
RAM serves as temporary storage for active tasks. When editing videos, large files are loaded into RAM for quick access. Insufficient memory can cause lag, crashes, or delays during rendering. Most experts recommend at least 16GB of RAM for basic editing, but 32GB or more is ideal for handling complex projects or multitasking.
Graphics Processing Unit (GPU)
The GPU accelerates video rendering and effects processing. While not as critical as the CPU for all editing tasks, a dedicated graphics card improves performance in GPU-accelerated software, such as Adobe Premiere Pro or After Effects. NVIDIA and AMD produce GPUs suited for creative workloads and have budget-friendly and high-end models.
Storage Drives
Storage solutions determine how quickly files are accessed and saved. Solid-state drives (SSDs) are faster than traditional hard disk drives (HDDs), making them better for video editing. A typical setup includes a smaller, high-speed SSD for the operating system and software and a larger SSD or HDD for storing raw footage and projects.
Choosing The Right Processor (CPU)
The CPU is the most critical component for video editing. It affects everything from timeline responsiveness to export times. Two leading brands dominate the market: AMD and Intel. AMD's Ryzen series and Intel's Core i5/i7/i9 processors are popular choices, with higher-tier models offering more cores and threads.
Core Count vs. Clock Speed
Video editing benefits from both high core counts and fast clock speeds. Multi-core processors handle tasks like rendering and encoding more efficiently, while higher clock speeds improve single-threaded performance, which is crucial for real-time playback. A CPU with 6-8 cores balances cost and performance for most users. Enthusiasts working with heavy effects or 8K footage may opt for 12-16 cores.
Recommended CPUs
AMD Ryzen 5 5600X: A budget-friendly option with six cores and 12 threads, suitable for 1080p or 4K editing.
Intel Core i7-13700K: Offers 16 cores and high clock speeds, ideal for mid-range 4K projects.
AMD Ryzen 9 7950X: A top-tier chip with 16 cores, perfect for high-resolution footage and complex workflows.
Importance Of Ram In Video Editing
RAM acts as a workspace for the CPU, holding data that needs to be accessed quickly. When RAM is insufficient, the system relies on slower storage drives, leading to bottlenecks. For video editing, 16GB is the minimum, but upgrading to 32GB or 64GB ensures smoother performance, especially when using resource-heavy software like After Effects or working with multiple timelines.
Speed and Latency
RAM speed, measured in megahertz (MHz), impacts how quickly data is transferred. Faster RAM reduces delays, but the difference is minimal unless working with ultra-high-resolution files. Most users benefit from DDR4 3200MHz or DDR5 6000MHz kits. Low-latency RAM (CL16 or lower) is preferable for optimal performance.
Selecting The Best Graphics Card (GPU)
While the CPU handles most editing tasks, the GPU accelerates specific functions like colour grading, effects rendering, and real-time playback. Software like Premiere Pro and DaVinci Resolve utilizes GPU power to enhance performance.
Integrated vs. Dedicated GPUs
Integrated graphics, built into the CPU, are sufficient for basic editing but struggle with high-resolution footage or effects. A dedicated GPU, such as NVIDIA's RTX series or AMD's Radeon RX lineup, provides the horsepower needed for smooth 4K editing and complex visual effects.
Recommended GPUs
NVIDIA RTX 4060: Affordable entry-level card for 1080p and 4K editing.
AMD Radeon RX 7700 XT: Strong performance for 4K workflows and colour grading.
NVIDIA RTX 4080: High-end option for 8K editing and intensive effects.
Storage Solutions: SSDs Vs HDDs
Storage drives store the operating system, software, and project files. Solid-state drives (SSDs) are significantly faster than hard disk drives (HDDs), reducing load times and improving responsiveness.
NVMe SSDs vs SATA SSDs
NVMe SSDs connect directly to the motherboard via the PCIe interface, offering speeds up to 3,500MB/s. SATA SSDs max out at around 600MB/s but are more affordable. A typical setup includes an NVMe drive for the OS and software, paired with a SATA SSD or HDD for bulk storage.
Recommended Storage Setup
Boot Drive: 500 GB- 1 TB NVMe SSD for the operating system and programs.
Project Drive: 2 TB- 4 TB SATA SSD for active projects and footage.
Backup Drive: External HDD or cloud storage for archiving finished projects.
Budget-Friendly Options For Building Your PC
Building a custom PC doesn’t have to break the bank. Prioritizing key components and choosing cost-effective parts can deliver excellent performance without overspending.
Balancing Cost and Performance
Focus on investing in a strong CPU and sufficient RAM, as these significantly impact editing workflows. A mid-range GPU and NVMe SSD provide good value, while storage capacity can be expanded later. Reusing parts from an old PC, like the case or power supply, also reduces costs.
Sample Budget Build
CPU: AMD Ryzen 5 5600G ($200)
Motherboard: B550 Chipset ($150)
RAM: 16GB DDR4 3200MHz ($60)
GPU: NVIDIA GTX 1650 ($130)
Storage: 500GB NVMe SSD + 1TB HDD ($100)
Case and PSU: $100 total
This setup handles 1080p editing and basic 4K projects while leaving room for future upgrades.
Step-By-Step Guide To Assembling Your PC
Building a PC requires careful planning and attention to detail. Follow these steps to ensure a successful build:
1. Gather Tools and Components
Collect all parts, including the CPU, motherboard, RAM, GPU, storage drives, power supply, case, and cooling system. Tools needed include a screwdriver, zip ties, and thermal paste.
2. Install the CPU and RAM
Attach the CPU to the motherboard’s socket and apply thermal paste. Insert RAM sticks into the DIMM slots, ensuring they click into place.
3. Mount the Motherboard
Place the motherboard into the case, aligning the screw holes. Secure it with standoffs and screws.
4. Install Storage Drives
Mount the SSD and HDD in the case’s drive bays. Connect them to the motherboard using SATA cables and power cables from the PSU.
5. Install the GPU
Insert the graphics card into the PCIe slot and secure it with screws. Connect power cables if required.
6. Connect the Power Supply
Mount the PSU in the case and connect all necessary cables to the motherboard, drives, and GPU.
7. Attach Cooling System
Install the CPU cooler (air or liquid) and add case fans for airflow. Proper cooling prevents overheating and maintains performance.
8. Final Checks and Boot-Up
Double-check all connections, close the case, and plug in peripherals. Power on the PC and install the operating system and drivers.

Cooling And Power Supply: Essential Considerations
Overheating can damage components and reduce performance. A robust cooling system, including air or liquid coolers, checks temperatures. High-quality power supplies ensure stable energy delivery and protect against surges.
Choosing a CPU Cooler
Stock coolers work for basic builds, but aftermarket air or liquid coolers offer better thermal management. Liquid cooling is efficient but pricier, while tower-style air coolers provide good value.
Power Supply Wattage
Calculate total wattage requirements by adding up each component's power draw. A 500W-600W PSU suits budget builds, while high-end systems need 750W or more. Look for 80+ Bronze certification or higher for energy efficiency.
Maintaining Your Video Editing PC
Regular maintenance extends the lifespan of a video editing PC. Dust buildup, outdated drivers, and fragmented storage can slow down performance.
Cleaning and Upgrades
Dust the inside of the case every few months to prevent overheating. Upgrade components like RAM, storage, or GPU to meet evolving software demands.
Software Optimization
Keep drivers and editing software updated for compatibility and performance improvements. Use disk cleanup tools to free up space and defragment HDDs (not SSDs) periodically.
Building a custom PC for video editing empowers creators to tailor their setup to specific workflows. By selecting the right components and following proper assembly techniques, anyone can create a machine that delivers reliability, speed, and scalability for years.