Advertisement
Have you ever eaten cooked broccoli only to find it mushy and dull? It's a shared kitchen nightmare that many home cooks face. We all dream of serving plates with vibrant, perfectly cooked veggies, but sometimes, the reality needs to be improved. There's a simple trick that can transform your vegetable game: blanching.
This quick cooking method is chefs' secret weapon everywhere. It helps preserve your favourite vegetables' bright colours, crisp textures, and fresh flavours. By mastering the art of blanching, you can create dishes that taste amazing and look Instagram-worthy, too.
This blog post will provide easy yet powerful tips for blanching vegetables to keep their colours popping. So grab your apron and prepare your meals for a colourful makeover!
Blanching is like giving your veggies a quick spa treatment. This simple technique does wonders for keeping your greens green and your oranges orange. It's all about preserving that natural vibrancy that makes fresh produce appealing.
When you blanch vegetables, you not only make them pretty but also lock in essential nutrients that can be lost during more extended cooking methods. Plus, it's a great way to prepare veggies for freezing, ensuring they stay fresh and tasty for months.
But the magic of blanching doesn't stop at looks. It also helps vegetables keep their satisfying crunch, avoiding the dreaded mushy texture that can turn a good meal into a disappointment. By mastering this easy cooking trick, you can serve up vegetables that look as good as they taste. Trust me, once you start blanching, you'll wonder how you cooked without it!
Now, let's begin learning this technique. With just a few easy steps, you'll be blanching like a pro in no time. Follow along as we break down each part of the process and give you all the tips to make your vegetables shine.

The journey to perfectly blanched veggies begins with a pot of boiling water. Fill a large pot with water; you want enough to submerge your vegetables fully. Here's a crucial tip: make sure to take the salt! Add a generous pinch to the water. This isn't just for flavour, though that's a nice bonus. Salt helps your vegetables keep their vibrant colours during the blanching process.
It's like a shield, protecting those beautiful hues from fading away. As the water heats up, it starts to bubble and steam. Please wait until it reaches a rolling boil before moving on to the next step. This ensures your veggies cook quickly and evenly, which is critical to preserving their texture and nutrients.

While your water is heating up, it's time to set up the most critical part of blanching: the ice bath. This chilly dip is the secret to keeping your veggies crisp and colourful. Fill a large bowl with cold water and add plenty of ice cubes. If you want it to be freezing, consider it a refreshing pool for your hot vegetables to dive into.
The ice bath stops the cooking process quickly. Without it, your veggies would continue to cook from their heat, even after you've taken them out of the boiling water.
This could lead to mushy textures and dull colours - precisely what we're trying to avoid! Place your ice bath near your stove to quickly transfer the vegetables from the boiling water to the ice bath.
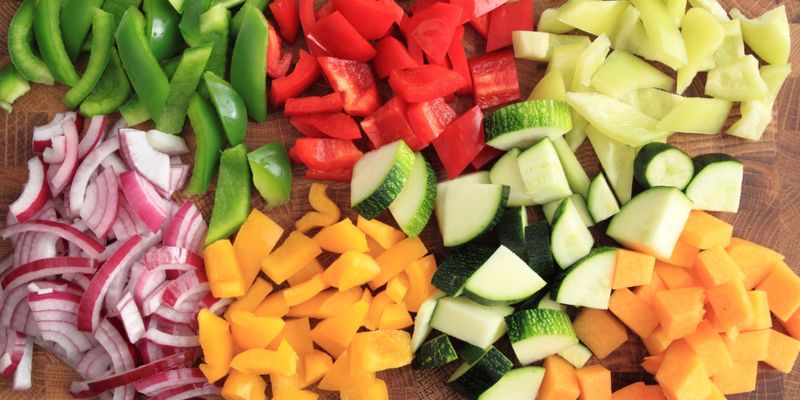
Before you start blanching, it's essential to prep your vegetables properly. The key here is consistency. You want all your vegetable pieces to be roughly the same size. This isn't just about making your dish look neat (although that's a nice bonus). Even-sized pieces ensure that all your vegetables cook at the same rate.
If some pieces are much larger than others, you'll end up with a mix of undercooked and overcooked veggies. Nobody wants that! For most vegetables, aim for bite-sized pieces.
Broccoli and cauliflower can be cut into florets, while carrots and green beans can be sliced diagonally. Remember, the goal is to make each piece similar in size and thickness so they'll all be perfectly cooked when you're done blanching.
Blanching isn't just about looks; it's a nutrient-saver too! When you blanch veggies, you give them a quick hot bath that locks in all the good stuff. This speedy cooking method means vitamins and minerals need more time to escape.
Unlike long, slow cooking, which can drain nutrients, blanching keeps your veggies healthy and flavoured. It's like pressing pause on the veggie's natural breakdown, keeping all those essential nutrients right where they belong—in your food!
While blanching and steaming are gentle cooking methods, they're different. Blanching involves dunking veggies in boiling water and quickly cooling them. It's great for preserving the colour and preparing for freezing.
Steaming, on the other hand, cooks veggies with hot vapour. It's gentler and suitable for delicate veggies. Blanching is your go-to for vibrant colours and crisp textures while steaming works well when you want softer veggies that keep more of their original flavour.
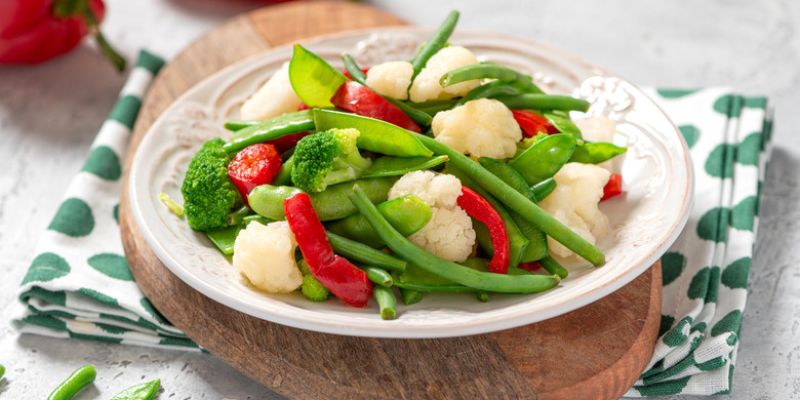
Not all veggies are created equal when it comes to blanching. Some shine with this method. Green beans, broccoli, and asparagus are blanching superstars; they keep their bright green colour and crisp texture. Carrots and cauliflower also benefit from a quick blanch, becoming tender-crisp and more vibrant.
Even leafy greens like spinach and kale can be blanched to reduce bitterness and improve texture. Remember, each veggie has its perfect blanching time, so watch the clock for the best results!
Now you know the secret to veggies that pop on the plate and tantalize your taste buds! Blanching is your ticket to preserving colour, texture, and nutrients in one simple step. It's not just for fancy chefs; it's a game-changer for everyday meals and meal prep.
Imagine serving up a rainbow of crisp, vibrant veggies that look as fresh as the day you bought them. Why wait? Your next meal could be bursting with colour and flavour. Grab some fresh veggies and give blanching a try tonight.
You'll wonder how you ever cooked without it! With a bit of practice, you'll be blanching like a pro in no time, making every meal a feast for the eyes and the stomach.
Advertisement
